I have had a bunch of camps going on the last few weeks, and as a result I haven't been updating (I'm sure you couldn't tell..) In any case, here I am updating again. For one of my camps, I was a counselor, and I had to make something for about 13 of the girls going to it. I chose to make leather bracelets. This is what they turned out looking like!
So, not the best picture I've ever taken, but it illustrates pretty well what they looked like. Basically, a strip of leather tied with leather cord to fit around the wrist.
These are harder than you would think initially, or at least they were for me. First problem: procuring leather. I managed to hit upon a jackpot: Michael's apparently sells leather scraps for about $7-8 for a pound of it. This is considerably cheaper than any other way you can buy it, and the leather I got was also higher quality than any of the other stuff they were selling.
The only problem? Higher quality means thicker. Which, in turn, means harder to work with sewing-wise. Didn't faze me, though, since I wasn't sewing.
Along with the leather I got a few leather working tools. in hindsight, I may not have needed them all. I'll explain. This tool was imperative. You NEED a set of punches to make bracelets like mine. These come at about $6 at Micheal's.
This tool, on the other hand, is for engraving. Probably I'm just not super experienced with it, but I feel like I could have gotten the same kinds of results with a pencil and some other stuff I have at home. Not super easily nor as comfortably, but if you don't have $12 to spend on this, you could probably make do.
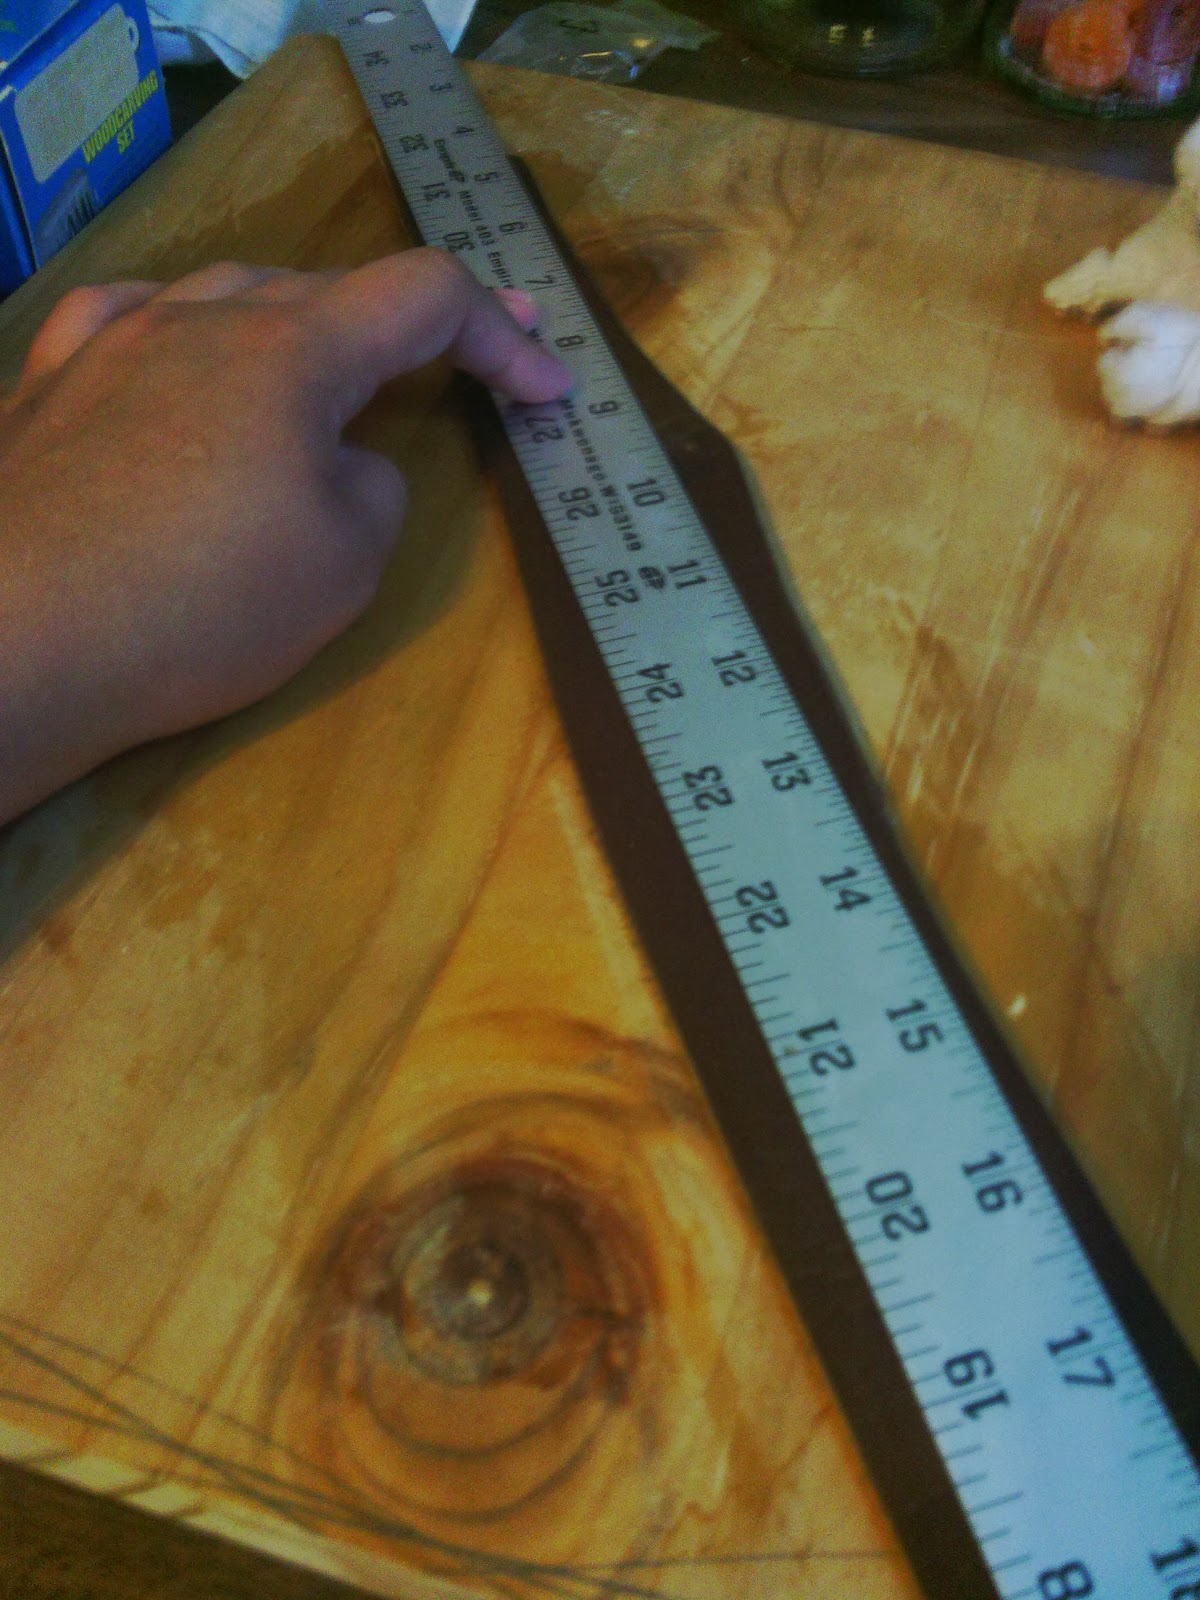
Another thing you absolutely DO need is a good work area. You'll be cutting a lot, so you want something you don't mind slicing up, such as this piece of scrap wood. The ruler is 1.5" wide, which is how wide I wanted my bracelets. Trust me, you'll want something more than just a traced line on your leather to cut against.
First rule to working with leather: Keep it wet. Not sopping, but keep a damp rag around, and make sure it stays the darker shade of wet leather.
Place your straight-edge down...
Get a razor blade/exact-o knife to cut with...
And cut that stuff. Don't expect the leather to cut through completely the first time- that's why you have a straight-edge, to make sure your overlapping cuts don't cut into the actual bracelet part. You're going to want to just make a ton of long, shallow cuts until the leather is cut through.
It should pull away something like this when you pull at it, and shouldn't resist. If it does, keep cutting. Don't rip it.
Here's my piece cut as far down as I needed for one bracelet. As you can see, I started letting it dry out. Bad idea. Keep it damp.
I kept cutting the leather until I had a big long piece.
I re-dampened it, then measured 6" (the length of each of my bracelets). This isn't usually longer to go around the whole wrist, but it's enough to go about 2/3 around, then leave room for a square knot.
I marked this on both sides
I then re-dampened the leather between those two marks
Put the straight edge between them, and again cut.
And here is a fully cut piece of 6x1.5" leather.
At this point, I chose which punch I wanted to use. Because I got the cord from the same scrap bag, the cord was rather thicker than most, so I used the second to biggest punch.
It attaches to look like this.
You position it, then pound.
This process is not fast. It also takes a lot of effort. It's easier if the leather is wet (again, I did this 26 times, twice for each of 13 bracelets. The first one I made harder for myself than necessary). If I had thought of it, I would have shown you the hole made in the board. The punch will go through that stuff into your board, which will leave a nice little circle cut into your work surface. Even if it doesn't, it always indents it. Like I said before, you want to use scrap wood to protect whatever it is you're working on.
This is what it looks like with both holes. You can kind of see the one divot I made in my board with those two holes.
At this point, I re-dampened it, traced one of the girl's names into the leather with the small end of the tool (could have use a pencil), then pushed harder with the spoon end to make the wider end (could use a narrow piece/end of silverware) to make the deeper imprints that are more obvious.
As you can see, the deeper ones are more obvious, though all of it can be seen while it's damp.
As you can see from the color of the edges which are drying, though, these imprints aren't super visible, nor are they going to be.
So, I deepened them. I repeated the pointy end/spoon end over and over, getting deeper each time.
This is what it ended up looking like, once it dried. It looked fine, but I wanted the name to pop a bit more than it was doing, so I decided to burn it.
After I burned it, you can see the name popped out quite a bit better. I now considered this one done.
In order to burn the leather, I made sure it was pretty dry, then used a soldering iron. This wasn't super precise, and was hard to use due to the long heating part. However, it was cheaper for me than going out and getting a 'wood burner,' which is what people recommend using, because I already had a soldering iron.
The important thing to remember is not to try to rush this. Take your time. Wait for the iron to heat up, wait for the leather to burn. Practice a bit before launching into your actual bracelet.
It won't look super great initially, if you're like me. Remember what I said about practice on a scrap piece? Well, I didn't do that.
It didn't look terrible, it just didn't look great.
This is the miracle sure-all, though, if you have untreated leather. It's called Mink Oil, and you should really have a tub of it for any leather product you have, whether it be gloves, shoes or jewelry.
This stuff (by it's own ad) 'waterproofs, softens and conditions all smooth leathers and vinyl'. What it really does is softens it, makes it water resistant, not water proof, and makes it last longer.
Oh, and it makes it darker.
Essentially, it turns it just barely lighter than the color it was when it was wet.
With my leather, which wasn't conditioned at all, I made sure to get all 6 sides of the leather. With shoes and such you really only care about the outside/smooth side, but since these girls were going to be wearing these on their wrists (which includes washing hands with them on), I figured more couldn't hurt.
This is what it looked like right after I finished mink oiling it. Note: this is before the leather has had time to cure, and before the oil has had time to soak in. The tub said to wipe off the excess after 5 minutes, but I just added more after 5 minutes, since it was the first time they were being treated.
Again with a 'right after' pic.
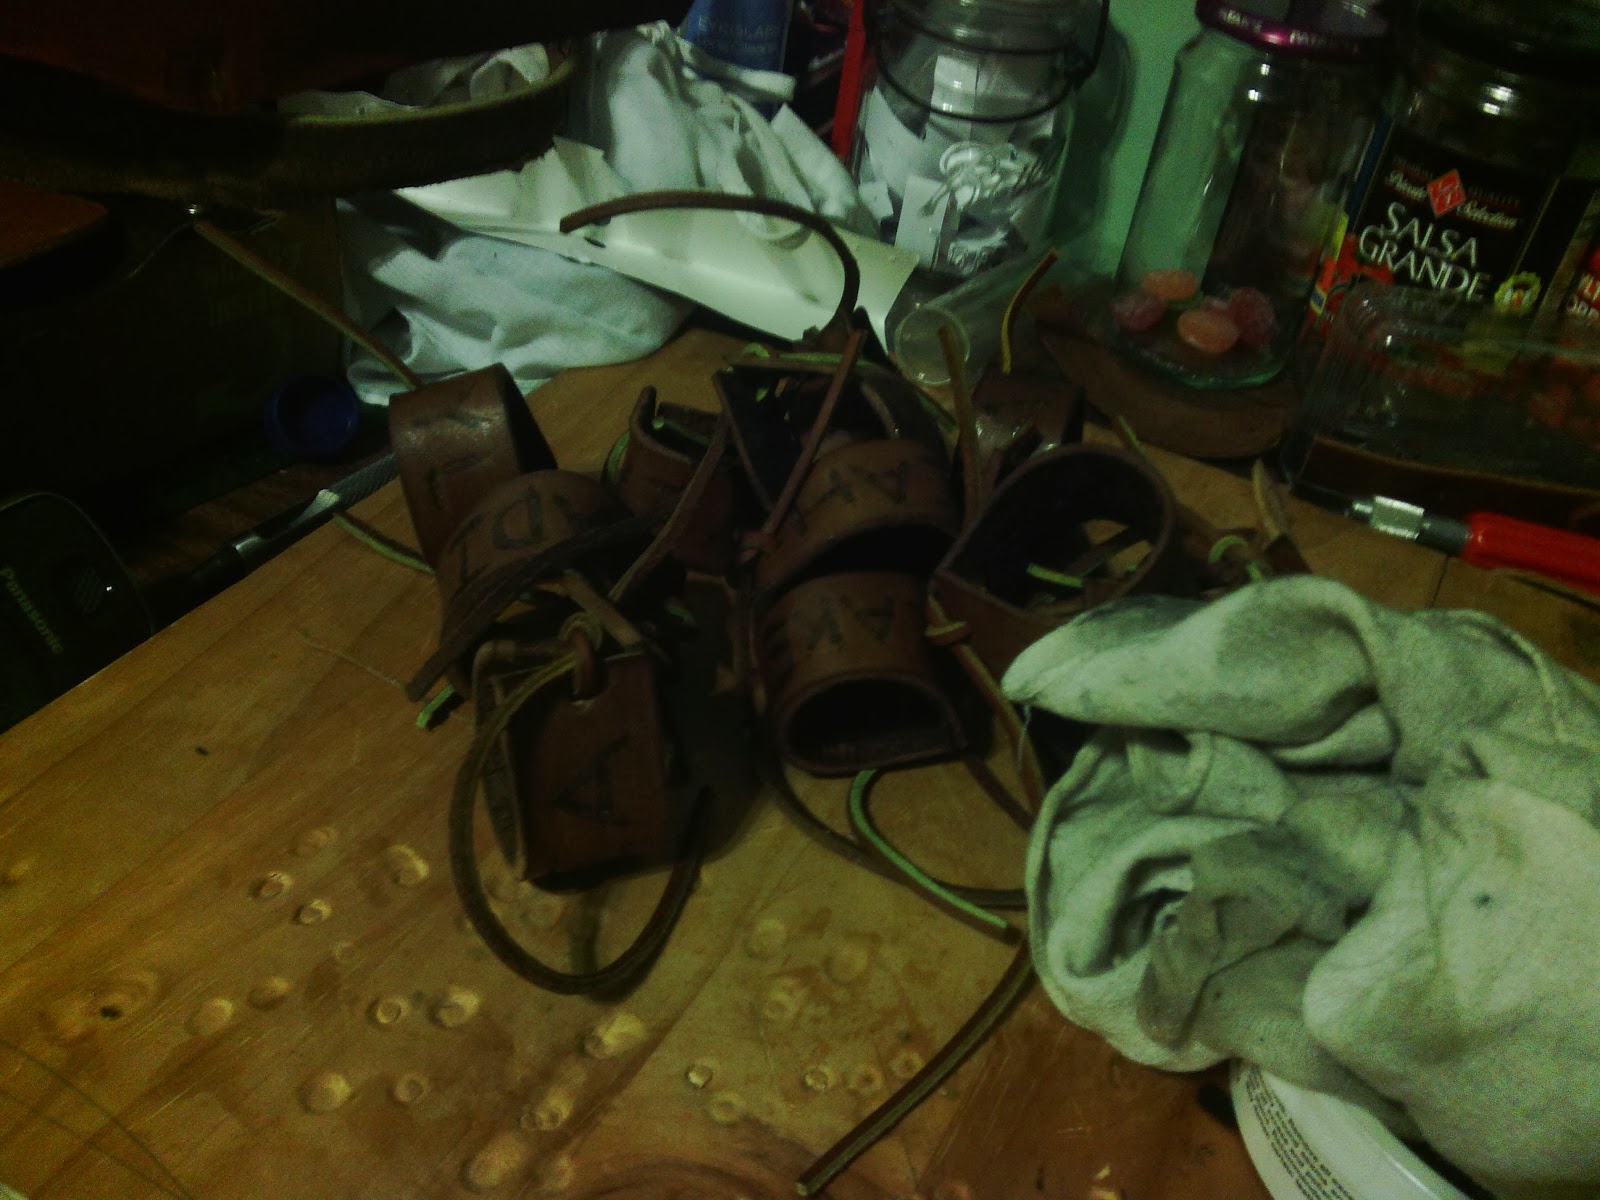
Here is the pile of them right after. Some of them have been done for a while, but some of them were just done.
And this is what they looked like the next morning. As you can see, after that initial color change, they pretty much stay the same color. I would suggest shaping them as they dry, since mine seemed to want to curl the other direction, but to each his or her own.
Voila! Your very own, super customizable, leather bracelets.
(PS: do you see those holes in the board? yeah, those are from punching holes. Be careful)


No comments:
Post a Comment