This is the toilet paper holder I put in. As you can see, it matches the other stuff I've put up.

This is the packaging it came in. It's the only one I've remembered to take a picture of, in case you want to know.
Please remember that there's going to be a bag of mounting hardware somewhere in the packaging. In the case of this one, it was inside the white box they used to back the holder itself. After some disassembly, this is what all was in that box. You should have everything here, even if your backing plate is two instead of one. Just make sure you don't throw anything away.

The real trick to this is measuring. I cannot stress enough that, despite my not having taken as many pictures of it, measuring is the hardest part of this. Mounting itself is relatively easy- placement isn't.
I put mine about two feet from the floor. That seemed pretty standard, and it's comfortable for most people. Placement in relation to your toilet is entirely up to you. make sure you like where it's going to end up, though.
I marked the long line two feet up, then made the cross marks on the right where a stud was. Most times you won;t be as luck as I was, but there we go. I had a stud, and it was almost exactly where I wanted it anyway, so I adjusted where I wanted it, and marked the wall.
The way these things work- those silver pieces (stainless steel, but close enough) are the mounting brackets that hold this thing to the wall. You need to get them out.
 In order to do that, use the enclosed allen wrench to take out the hex nuts on the bottom of the holder. They'll be on both sides. No need to take out the hex nuts all the way, just enough to get out the mounting brackets.
This is what my marks looked like when I was done with a ruler. The instructions should tell you how far apart to put your holes, but if not, a ruler works too.
This is important! Rulers are not sufficient to mount these things. Odds are, there's an imperfection in your measuring, or your floor, or something. USE A LEVEL! make sure all of your lines are level. It will help your job look professional, and it will hold up better.
In case you don't already know, Your level is level when the bubble is directly between those two lines. Try to get it as close to the middle as you can.
After leveling and re-measuring, this is what my lines looked like. Make sure you erase any marks that will show outside your holder.
As you can see, the right hand side had a stud behind it, as I mentioned earlier. Always make sure you check beforehand to see if there are studs. They came simplify your life.
As per instructions, I used a 1/16" bit to drill pilot holes for the screws on the side with a stud.
Make sure these are as straight as you can make them.
They should look something like this when you're done.
On the other side, I used 1/4" holes to make room for the anchors that go in there. The drill bit sizes should be int he instructions.
This is what my wall looked like before anchors.
These, by the way, are anchors. You push them into drywall, and when you screw into them, they expand and hold on very firmly. Just don't go trying to use your toilet paper holder as a climbing bar. You'll end up with a gaping hole in your wall.
You just push the things in like so. This is part of why you want to know what size to use- too big and they won't hold, too small and they won't go in. You can use a hammer, if necessary, but be gentle with it.
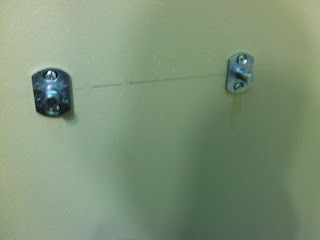
This is what they look like once they're put in.
As you can see, it's not necessary to have them be flush with the wall.
Use a phillips head drill bit to drill the screws in. A screwdriver would work, but a drill is much more efficient in this case.
 The rick to this is making sure you don't drill in the first screw all of the way before putting in the second one. If you do, it will be much harder to put in the second one, trust me. Tighten them after they're both in.
Like so.
Once both sides are in, you can go about installing the rest of the hardware.
Make sure you don't forget to put on the back plate before the rest of the stuff.
Remember, the hex nuts should look like this once they're fully screwed in.
Attach the middle bar, and voila! toilet paper holder.
Add some toilet paper, and it's actually functional!
And this is what our bathroom looks like after all that. Maybe in a week or two I'll get around to towel holders, but for now the bathroom is finally functional, so we'll leave it at that. And, frankly, once the tools are cleaned up it looks rather awesome, if I do say so myself.


No comments:
Post a Comment