Sunday, February 23, 2014

Chibi Pillow

This week's craft is a prototype for a similar item I will be making for a friend's birthday at some point in the near future, and I thought that it made a rather nice craft in and of itself.

I'm not sure that you can call this a proper chibi, but I thought it was cute. For those of you who can't tell what/who this is (only 2/5 of the people I showed it to recognized it), this is Sherlock. As it, from the show Sherlock. As in: 
This Sherlock. (the one in the scarf)

Regardless, here are the step towards making your own chibi pillow.

First step: research. Generally, this just means scrolling through pages on pages of endless fan art, photos, etc. I used Google Images- whatever you want to use also works. I would suggest looking at chibis, cartoons, photos, etc. This was honestly the hardest or second hardest (haven't decided) part of the whole project- it is much harder than you might think to simplify a character down to a little square for a  pillow.

In the end, this is what I came up with. The really signature things about Sherlock's look are his curly hair and his scarf, so those were the things I tried to focus on.
 I then started out with this pile of scrap cloth in various colors that I thought I'd need (I wasn't just doing Sherlock originally)
 Needing two squares for each pillow, and making two pillows, I needed four squares out of this one piece of cloth. It being a 45" piece of cloth, I cut it down to 11.25" wide.
 To be fair, I actually ripped it- most non-stretchy cloth will rip if you just notch it at the front.
 I then folded it in four, and cut along the folds.
 I chose just one square as the one I'd focus on- of the other three, one will be the back, and the other two will be the other pillow.
 I began by measuring and cutting the first piece of cloth into the rough size of the square's top, to serve as the base for the hair.
 I didn't chalk out the hair line, and it turned out ok, but I can tell you that this was a lot more difficult than it needed to be- the best suggestions that I have for you: DON'T USE STRETCHY CLOTH. Also, felt is really nice, since it doesn't have to be hemmed. If you absolutely must used stretchy cloth, use the kind that can be burn-hemmed.
 I then cut out little circles (about 1" in diameter) for the eyes. Again, make sure you burn or hem these.
 This is to illustrate the burning that I did. The hope behind all of this is that you won't be able to tell, unless you feel it, that it's been burned.
 The next thing I did was to cut out the black strip for his coat.
 I then cut out the scarf pieces. Here was my biggest mistake- I wanted the scarf to be this size, as it stands out really nicely this way. Unfortunately, I forgot all about the fact that this type of cloth can't be burn-hemmed, it has to be actually hemmed. Even with a small hem, that too 1/4-1/2" off of the scarf, which was enough to not look as good.
 Now, this is the part that was competing with the research for the hardest part. Because his hair is curly, it has crazy curves and whatnot, and sewing on that hair with a sewing machine was difficult. It wasn't impossible, but it took a lot longer than a straight line.
 I then sewed on the bottom black rectangle, then the slanty bit of the scarf, then the straight part of the scarf. You can already tell that the scarf isn't as significant or large as it did a picture or two back.
 Sewing on the eyes I would suggest taking very slow or doing by hand. Also, make sure you lay all of this out before hand. Maybe even (*GASP*) use pins.
 I'm not sure if this will help any of you seamstresses out there, but this is the back of my pillow, in case you cared where I sewed what.
 I then sewed the second square onto the pillow, right sides together. In this case, with this cloth, that basically just meant sewing a square onto the face you've just created. Make sure to leave a slit of turning right-side-out and stuffing.
 I then turned it right-side out, stuffed it, and sewed it shut. Usually, I will just sew it shut with a sewing machine, and ignore the one little ridge created by the sewing machine, but since (as stated previously), this is a prototype for a gift, I decided to try my hand at an 'invisible stitch', which is often used to close things like this.
  Unfortunately, my skills at needlework generally encompass functional sewing, not necessarily pretty sewing, so you can kind of see my stitches. Not as much as you would a sewing machine, though.
 And there we have it! Ta-daa! Your very own chibi pillow!


The final product was about 11x11, but this could be sized up or down as much or little as you wanted, depending on materials and time.

Monday, February 17, 2014

Paint Chip Art

So, for those of you waiting for this two weeks ago, I'm sorry. I'm not a very consistent blogger... but behold! I have finished this project! (and I have a rather good idea for my next post)


Just as a note, this wasn't what I had originally intended to do- I had actually started this intending to copy a picture I saw somewhere of a rather awesome stylized peacock, but I couldn't find the picture later, so I did this instead. I still like it, a lot, and it's easy to add to, but still. I just thought I should let you know.

 To start with (this is a shocker, I know), you need a paint chip board. Or you could do this in a plain picture frame, as you will. However, I started with the the paint chip board I made last time.
 Next, I cut out this tree, and taped it on. Everything else has been and will be attached with staples, but paint chips are colorful, and inherently hide staples better than plain white paper.
 Next, I chose a few paint chips out of the ones I had left, I think 5 or 6, and cut out a bunch of leaf shapes from them. These don't have to be perfect, and actually look cooler with a bit of variance.
I then stapled them on in a suitably artistic manner, and.. ta-daa! You have your cool art work. I liked the falling leaf look, so I did that, but this method works for almost anything you want to put up there.

Sunday, February 2, 2014

Paint Chip Wall Art

This week features a rather fun project for me: paint chip art! This, fortunately, is one of those almost-free things that you can do!
 I actually got the idea for this particular project a while ago, when I saw a particularly creative picture on Facebook of paint chips artistically attached to an apartment wall in a rainbow collage-type-thing.

I immediately set out to collect paint chips, and got all that I could get my hands on... and when I got home, I promptly realized that I lacked the wall space to create a masterpiece like the one I had seen, so I stored them all away in a box.

 Luckily, I recently found this unused cork-board around our house recently, and I decided to use it.
 I organized my color chips into sizes.
 Starting with the biggest ones, I started placing them
 I then added all of the medium ones.
 At this point,  I rather liked the design that was emerging, but wanted to spruce it up with some smaller ones, so I stapled down the big ones at a few key junction points, then started placing the smaller ones.
 This was the whole after-stapling collage of big ones. I could have been done here, but I liked the smaller 'pixel' look that I had seen, so I added some small ones. Unfortunately, I didn't like how it looked. Or how the second one looked. Or the third.
 Eventually, I settled on this design as one I liked. It almost made me sad, knowing that I wasn't taking advantage of the big ones underneath at all, but one of the big things I learned from this one was that trial and error are essential to this type of art.
And there we go! The final product! As it happens, I did sort of end up using the big one, as I decided to forego the right edge chips in favor of the big ones showing through, rather than cutting them.

Hopefully, I will, by next week, have up the follow-up to this project. No hints, except that this is only the first half, but in the meantime, enjoy your new collage! (also, one thing I like about this- it's easy and cheap enough that, if you decide you want to change the colors, it's easy enough to rip a chip off and re-staple something else in instead)

Sunday, January 12, 2014

Jersey Infinity Scarf

Jersey infinity scarves are one of the easiest (wearable) crafts you can do, while also being one of the most versatile and useful. While they are easy to make regardless of where your material came from, I find that Jersey fabric is often quite expensive from craft stores, so I opt for a different method.

 This is a dress (I think. That or a very long skirt) that I found at Goodwill. There are lots of these, usually. or at least one. If you go many times, you're bound to find one of these eventually. They're the kind of skirt/dress that I don't really mind cutting up and using for something else, because they really don't look that great as skirts, anyway. Regardless, you can usually find one of these, easily at least 2 yards of jersey fabric, for between $3 and $4, in a variety of patterns, prints and colors.
 The basic method for this craft is very simple, and it's the same, regardless of whether you're turning a skirt into a scarf, or a dress into one: you cut off the top. With this dress, that meant cutting off the whole top of the dress, with skirts it just means cutting off the waistline.
 Once you've done this, you should end up with a cut kinds like this. As you can see, I didn't care too much about how neat my cut line was (in fact, it's pretty bad).
 When you pick it up like this, though, you can't tell too much.

At this point, for best results, stretch the tube. This will make it work a bit more nicely. Usually, skirts and dresses are pre-stretched, but stretching is always fun.

Next, you should wash it. As many times as it takes to get rid of that Goodwill smell. If it bothers you normally, it will bother you a lot more when it's right up next to your face.

Also, if you're feeling creative, you can take this opportunity to sew it into a tube. I tend to just leave my scarves like this, then bunch them up.
 The place where my arm just was is now where my neck is. Like I said, I just bunch it up. Ta-daa! you have now completed your scarf! Go crazy with how you wear it! Make lost of different kinds! Mix and match them! As you can see, this is SUPER easy.
And then there's how I normally wear them.

Just a tip: some skirts/dresses have tags on the inside long seam, so check yours, and cut them off if they're there. Otherwise, they tend to look funny.

Friday, December 27, 2013

Harry Potter Wand and Wand Box

So.. it's been a long time. This blog post is actually inspired by/because I got assigned a person who likes Harry Potter for a Secret Santa, and this is what I came up with by way of gifts for that. Granted, the Secret Santa was a week and a half ago, but still. At least this is still the same month, no?

To start with, I did make the wand, but I forgot to take pictures, so I'll just describe the process to you-  I first cut a dowel rod to the length that I wanted. In this case it was about 11 inches. I then measured the size of my hand/gripped fist around the base of the wand (about 3 and a half inches), and decorated that portion with hot glue. Lots of hot glue. I put a rather large blob on the bottom of it, and a ring around the top, then just did whatever I felt like for the rest. No rules here, let your imagination run wild! The next thing I did was use a razor lade to carve down the rest o the wand to a point. This shouldn't be a sharp point, and you don't necessarily want the wand to be smooth. Imperfections give it character.
Lastly, I painted the wand brown. Brown was just what I chose- they could be any color, including black, white, gold, brown with gold, or etc. The hot glue will take a few coats, and getting into all of those little cracks is obnoxious, but the end result is worth it.
 To make the box, there is a simple formula that will result in a rather nice box. Unfortunately for those used to SAE units, you'll be using centimeters for this. For the rest of the world, happy birthday.

The base box (that the wand will go into) should be [9cm + the length of you wand] long by 13cm wide.

the box lid should have the same dimensions, plus 4x the width of whatever cardboard you're using. Consult the image for details.
 Once you have traced and cut out your box rectangles, trace an inner rectangle into each one that is 3cm in from each edge. You'll need to cut out the corner squares, then fold up along the lines you have traced. You can then glue it together with hot glue. Hot glue has many uses, and is really nice for this. My suggestion to you would be to tape the corners together, then reinforce them with hot glue.
 Once you have both boxes made, nest them inside of each other to see how they fit.

I used an old pie box for my cardboard. If I did it again, I'd probably make my lid a bit tighter. It was fine, but it was a bit loose, and I wished it was just the tiniest bit smaller. This is your chance to fix that.

 At this point, you have a fully functional wand box, but it isn't super pretty, so it's time to decorate it. A quick google search will yield a great variety of decoration ideas. One that I really liked was a more textured box using wallpaper. I didn't have any, though, so I used wrapping paper that was plain white on the back. The biggest thing is that you don't want to have to use more than one piece of paper.
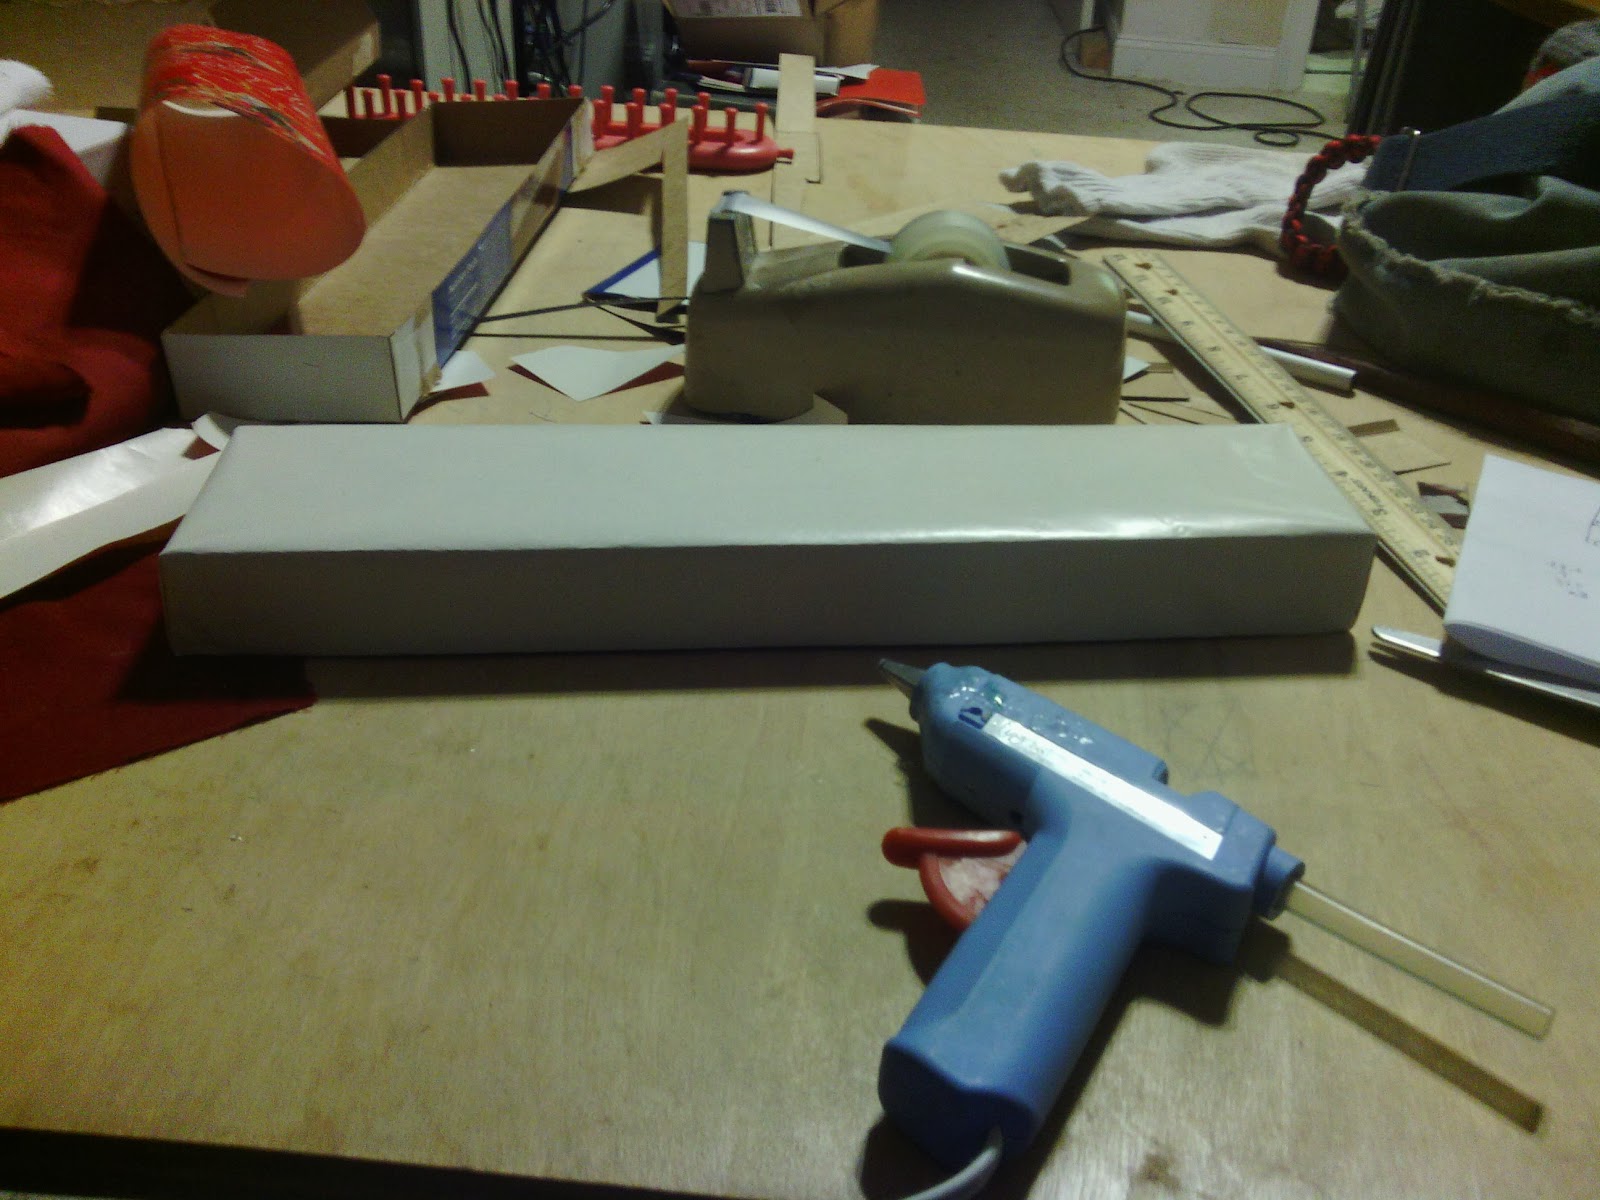
 Start by wrapping your box (I only show one half done here, but you just repeat the steps for the other half, and your box will be done). The piece of paper you use should be about 2-3 inches too long on every side. Wrap it long ways first, and crease it at the corners of the box. In order to prevent ugly tape stuff going everywhere, hot glue the bottom of your box to the paper at this point, and put some along the sides, too, for good measure. Make sure you smooth out the glue, though.
 You should end up with a long open tube of paper. To wrap the ends, cut the corners like so.
 Then, when all four corners have been cut, wrap in the one side, crease it, then  hot glue it down. Trim any excess, but overlap onto the ends isn't terrible. Repeat, so that both long ends are complete.
 For the long ends, a bit more work is required. Start by making the paper look rectangular. Experiment with any folding methods you like, like wrapping a present, but this is how I did it.

 I put a drop of hot glue in each of those openings, then tightly pressed it, folded and creased, then hot glued it. I then repeated this on the other side.
 You really want this to be tight, so that you get a nice, professional-looking box.
 And this is your box!
 Now, to finish up with details.
 The base of the box should be lined with fabric for the wand to sit in. Traditionally (I assume), this fabric would be velvet, but any fabric should do.

Here, I had some red, flowy fabric that I wanted to use. Unfortunately, I didn't quite have nough of it- you need enough to line the box, so it has to be at least 2 or 3 inches larger in every direction than your box. Mine was only about 1 in every direction.
 Start by folding the fabric over, then hot gluing the fabric down. The folded-over edge will make it look like you sewed it in, and will make it look professional. If, like me, you didn't quite use enough cloth, you can wad up some extra fabric at the bottom of your box for added volume.
 Then, repeat the process on the other side. Remember, the folded-over part should be about half an inch, and you want a nice hollow for the wand to rest in.
 Once the two sides are done, you can either tuck the ends in and leave them, or you can glue those in. Those will be harder, but gluing them will be well worth the effort to look like an authentic wand box.
 At this point, it would be a good idea to put the wand in and make sure it will fit. As you can see, my ends weren't perfect, but they look pretty nice, and no one will look at that box and have the first thing that pops into their minds be the imperfect end.

When you top the box, your wand should be far enough down to allow the lid to completely cover the bottom, like it did before. If not, you'll have to fix that somehow.

At this point, your box is done, but for ease of opening, I would suggest using scissors or a razor blade to cut little box-handles into the bottom center edge of each side of the box, to aid in the removal of the lid.

Also, final embellishments of wand numbers, sizes, and Ollivander's brand logos are available online, and you should use them to finish off your box. These took me quite a while to find and re-size, and by the time they were done, I forgot to take a picture, so that's all, folks! Hope you enjoyed it!